Introduction
Start your journey of creativity with a block of clay. Clay is the most suited modeling material for a beginner and seasoned sculptor alike. With a combination of the right clay, modeling tools, and manipulation techniques, create a specific effect. Envision models and build various clay products such as pots, tiles, mugs, figurines, wall decor and more.
Types Of Clay
Ceramic Clay: Is water-based and contains clay minerals. Needs to be baked at high temperatures. Used to create ceramics such as earthenware, stoneware, porcelain.
Air-Dry Clay: Is oil-based and made of a combination of clay minerals, wax, and oil.
It is a popular material with kids and animation artists, due to its ease of use and availability in a multitude of colors. It is air dried and need not be baked or cured.
Polymer Clay: Is clay that does not contain any clay minerals. It is based on polymer polyvinyl chloride. Needs to be cured at about 275 degrees Fahrenheit in the oven. Used by artists, hobbyists, children and, jewelry makers.
Paper Clay: Is clay that contains clay minerals with a small amount of processed cellulose fiber. Allows dry to dry and wet to dry joints. Used in doll making.
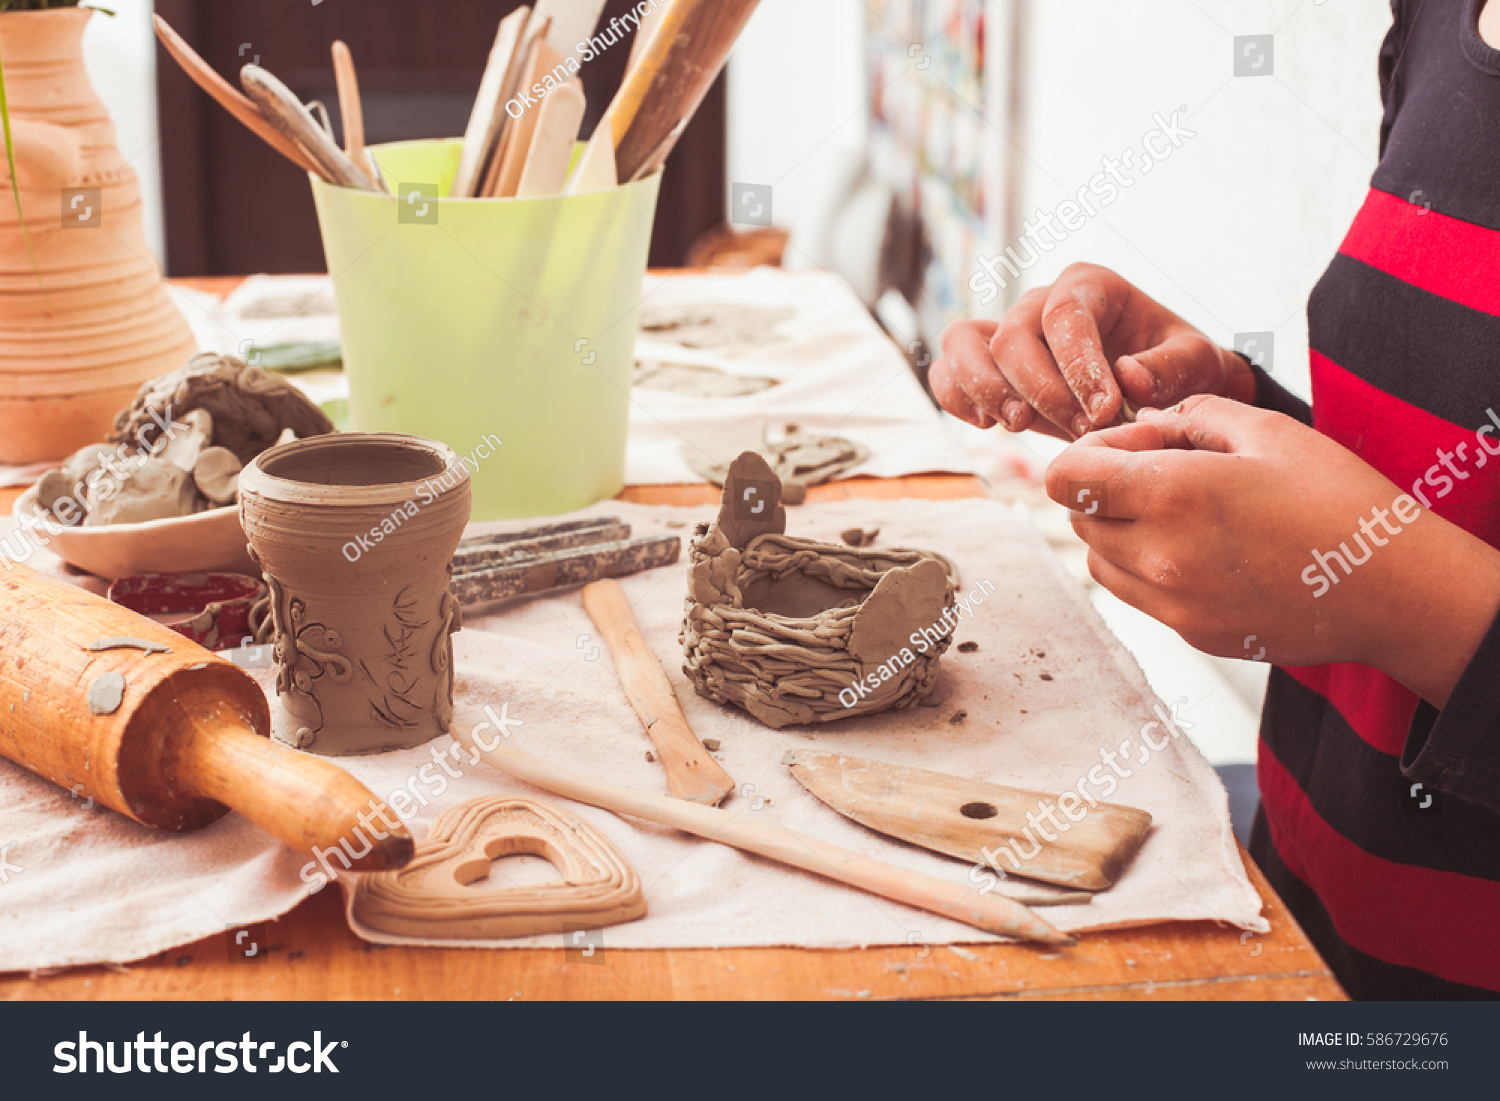
Handbuilding Methods And Techniques
Before the wheel was around, potters used their hands to create clay forms, and pots that were beautiful with simple tools and clay. Find below the trio of most practiced hand building techniques:
Pinch Pot: Working out of a small ball of clay, press your thumb in the center to form a deep indentation. Begin pinching around the center of the dent until you reach a desired shape and size. Build vases, bowls, and pots using this technique.
Coiling: Making clay coils by keeping the fingers flat and rolling the clay into long ropes. Various products can be made by stacking coils.
Slab: Texturing a slab of clay to create interesting shapes and patterns is a form of slab technique.
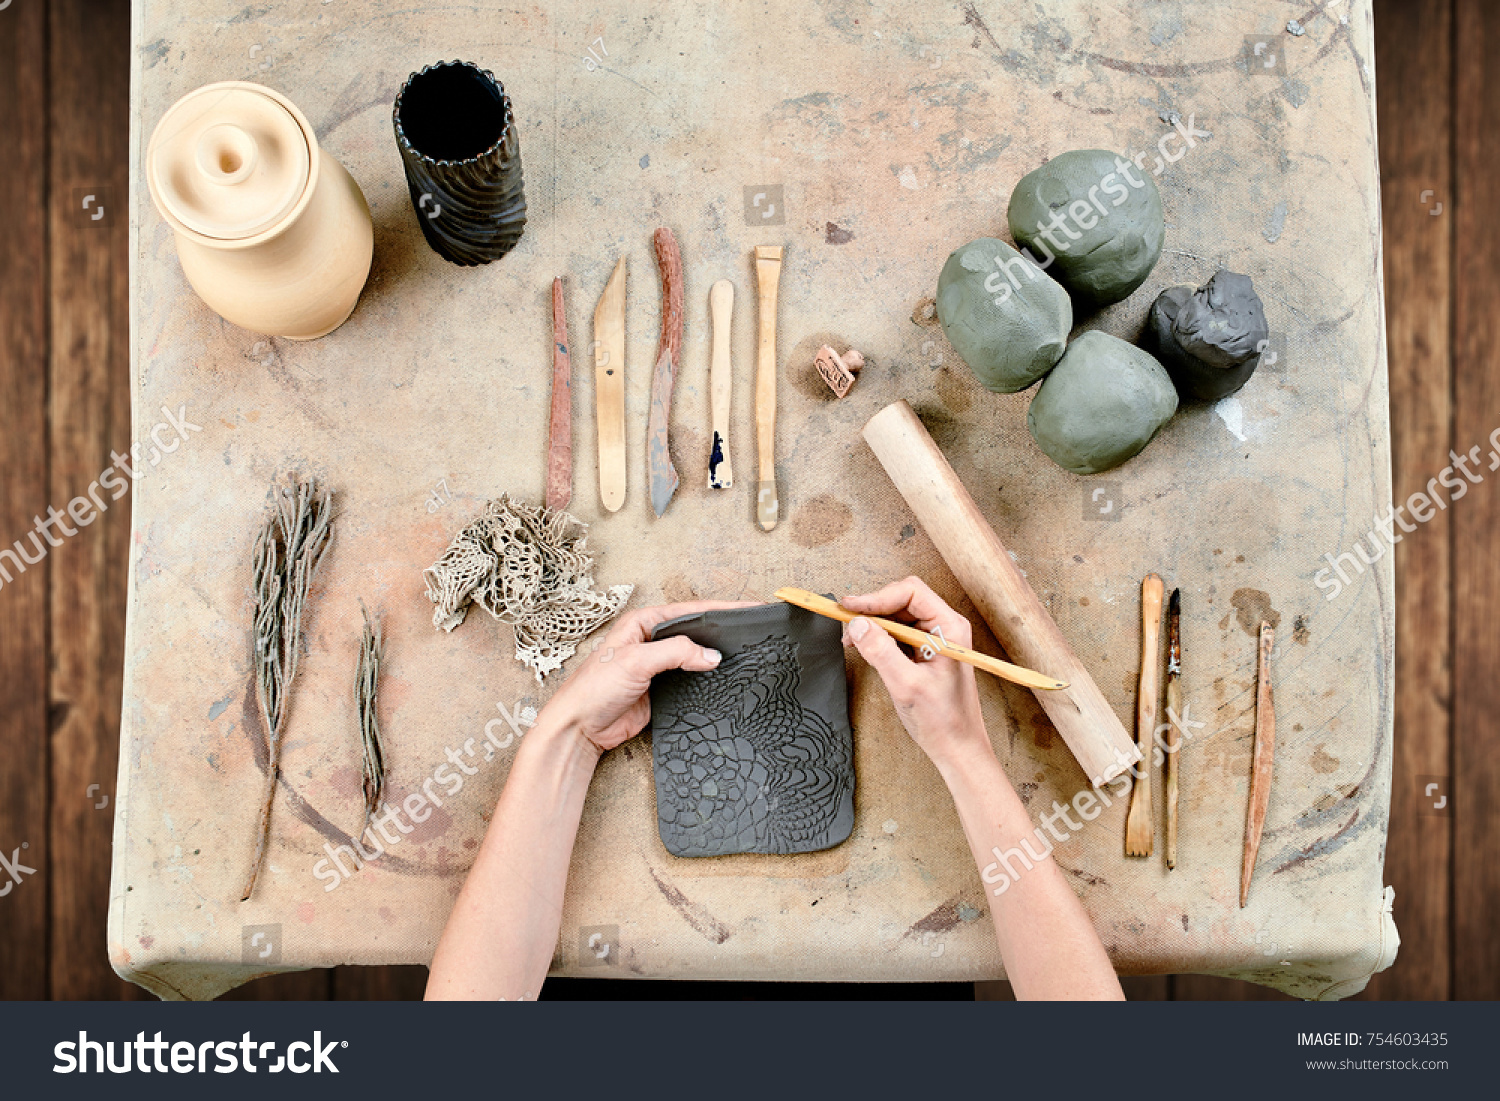
Materials and Tools
Wooden plank or board, rolling pin, air-drying clay, plastic sheets, newspapers, water, and stir stick.
Making Your First Coil Pot
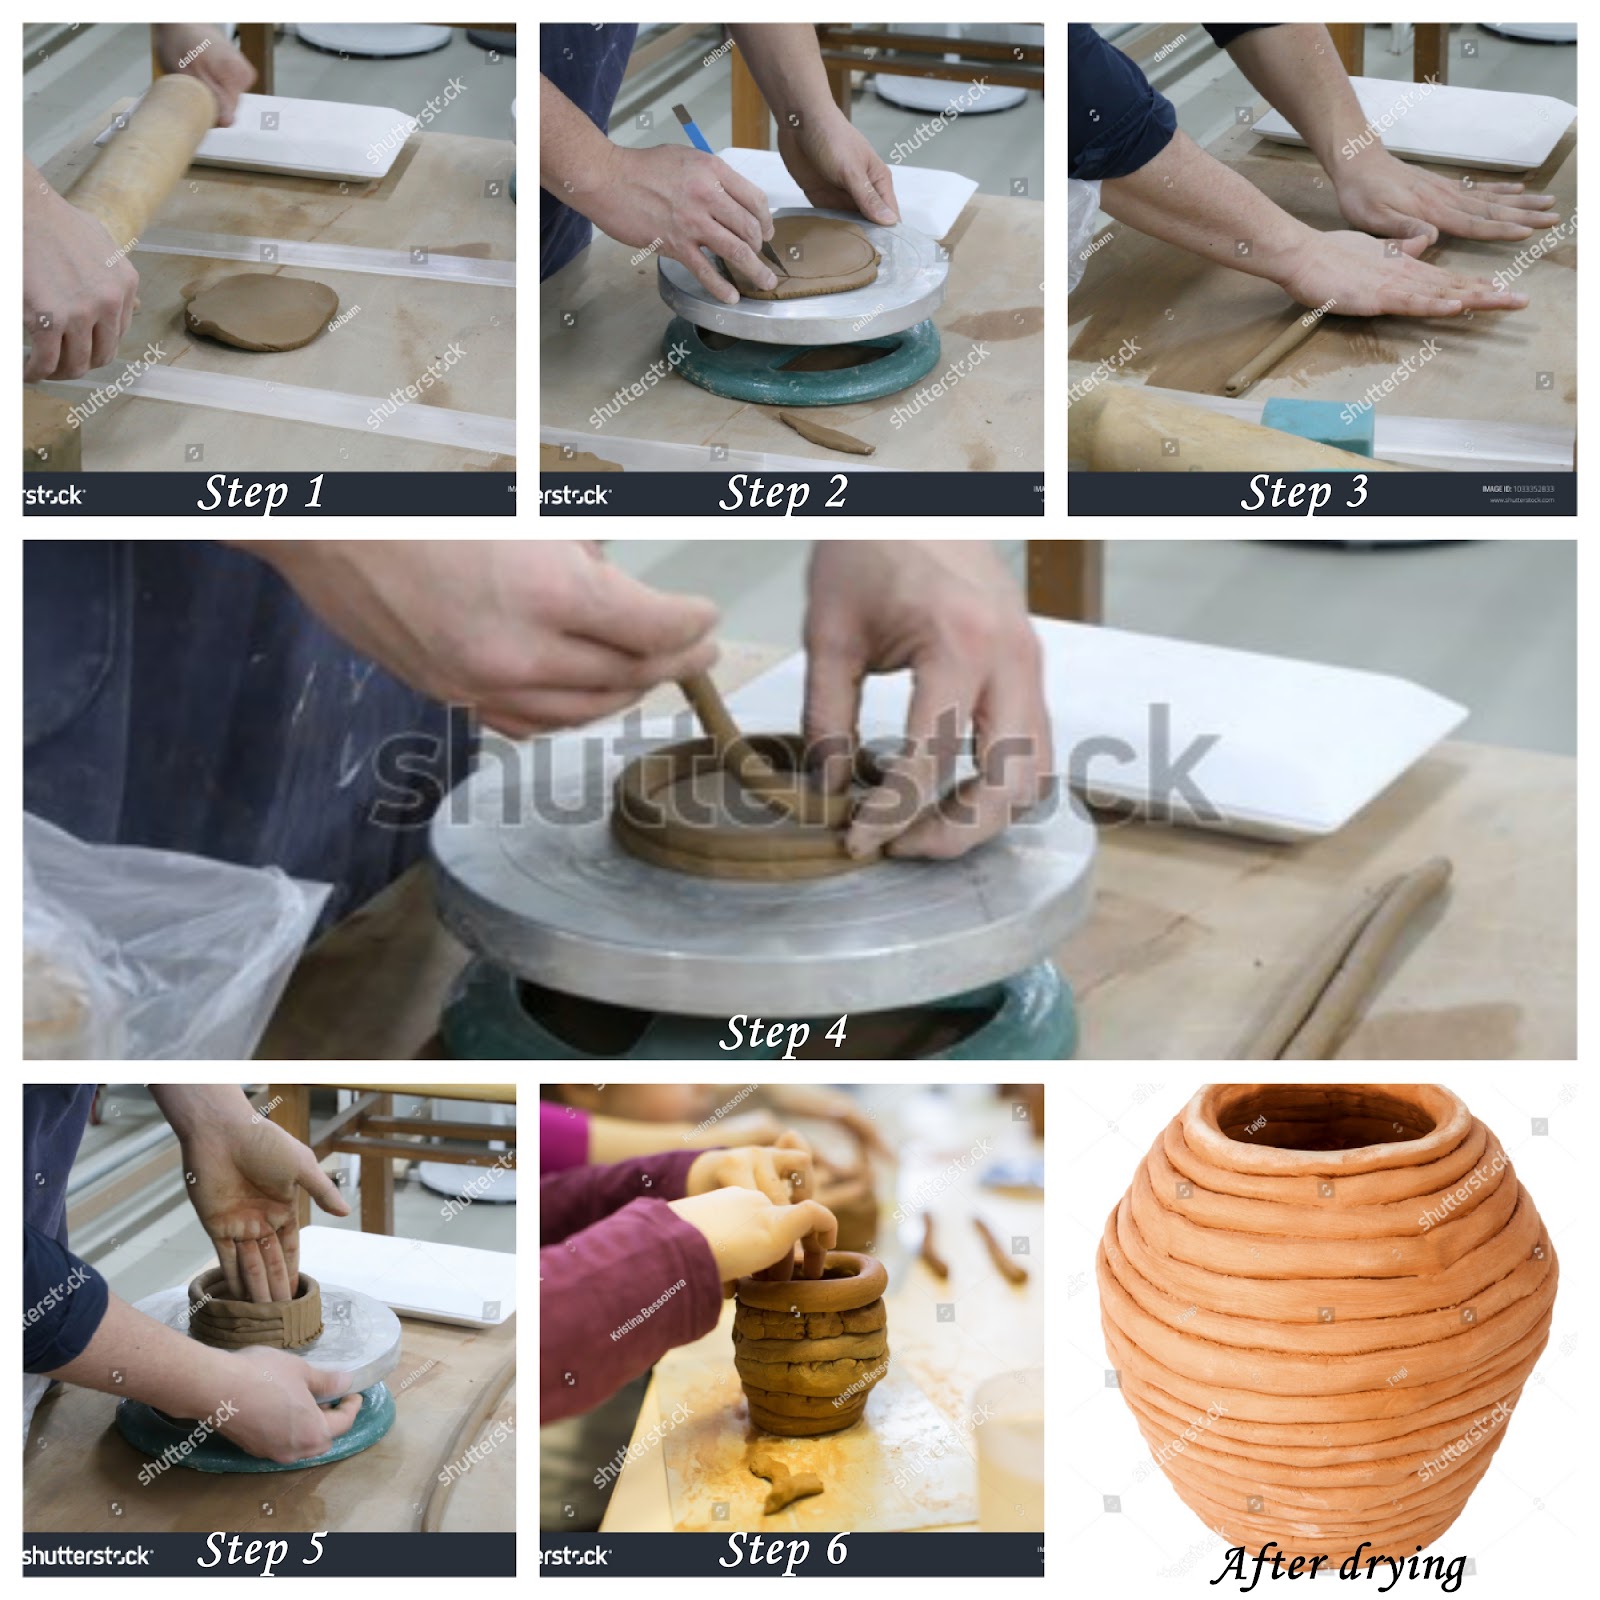
Take a small piece of clay, about the size of a lemon. Flatten it out to 1/4th inch of thickness using a rolling pin. Cut a slab of the desired dimension. This will form the base of the pot. Take a small amount of clay, lay it on the working station, squeeze and roll with your hands to make a long sausage shape. Make several smooth coils using the same technique. Cover these coils with a plastic sheet to avoid them from drying. Lay the first coil on the clay base. Score the base using a toothbrush. Slip it using a stir stick. Wind the clay coil on the outside of the base, blend and smoothen it from the insides using your finger. Support the outside of the pot using one hand while smoothening the insides. Continue adding coils. Attach them using the score and slip technique. Use the end of stir stick to blend the clay coils. Scoring and slipping allow the coils to be visible on both the inside and the outside. Once complete, set it aside and leave it for a week to air-dry. Once dried, it will be ready for you to paint.